Dynamic User Defined Fields
In Mailroom, you may add up to 25 user defined fields to mailroom and use them to maintain data that is specific to your organization. When a user defined field is added, the field is available throughout the mailroom module when a package is added.
User Defined Field Components
In Mailroom, a user defined field has the following characteristics:
- Name
- Data Type
- Status (required or optional)
Adding a User Defined Field
A user defined field may be added to mailroom via the web application or the Android application:
- Web Application: Add a dynamic user defined field at the Receive Package page, the Expected Package page, or at the Edit Package form (Packages Data page).
- Android Application: Add a dynamic user defined field at the Receive Package form.
Basic Process
A user defined field is added to the application from a specific area:
- User Defined Fields Tab (web application): the Expected Package page, the Receive Package page, and the Edit Package form have a User Defined Fields tab
- User Defined Fields Form (Android application): the Package Receive form has a User Defined Fields field, which leads to a User Defined Fields form: the user defined field is added from this area.
To add a user defined field follow this basic process:
- Go to the User Defined Fields area of the page or form.
- Click the Add button.
- Enter the user defined field name.
- Select the user defined field data type.
- Specify whether the field is required or optional for the package record.
- Save the field.
- The user defined field is added to IntelliTrack Mailroom and is available for use when adding a package or editing a package's record.
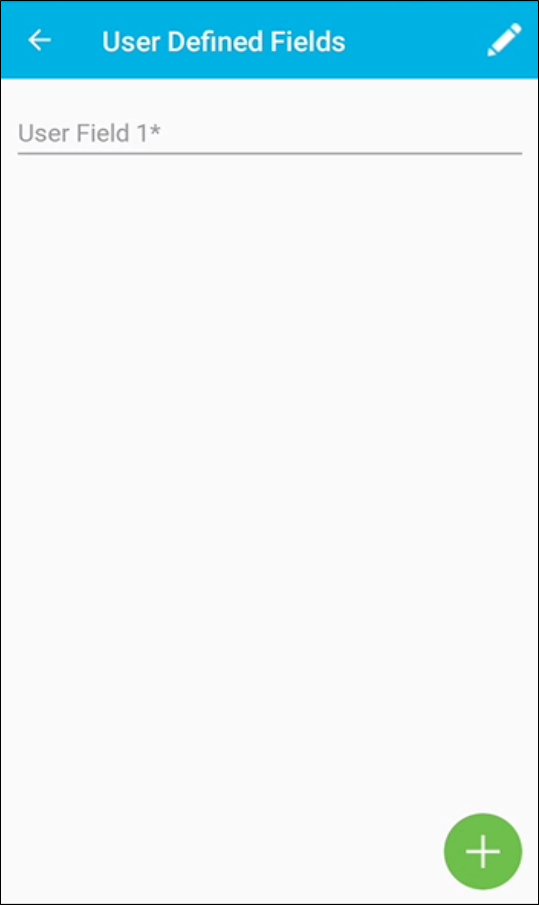
User Defined Field Form
The User Defined Field form is available from the Package Receive form.
- Select Packages > Package Receive. The Package Receive form appears.
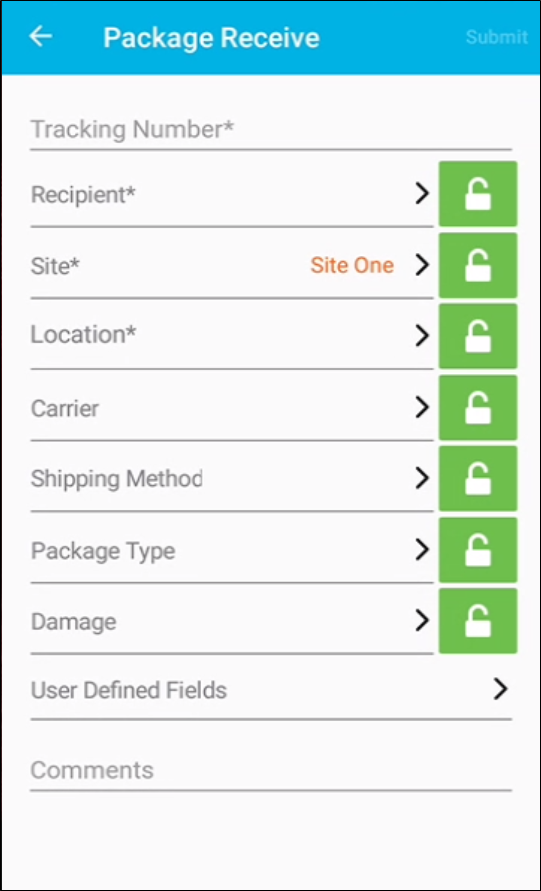
- Tap the User Defined Fields field. The User Defined Fields form appears.
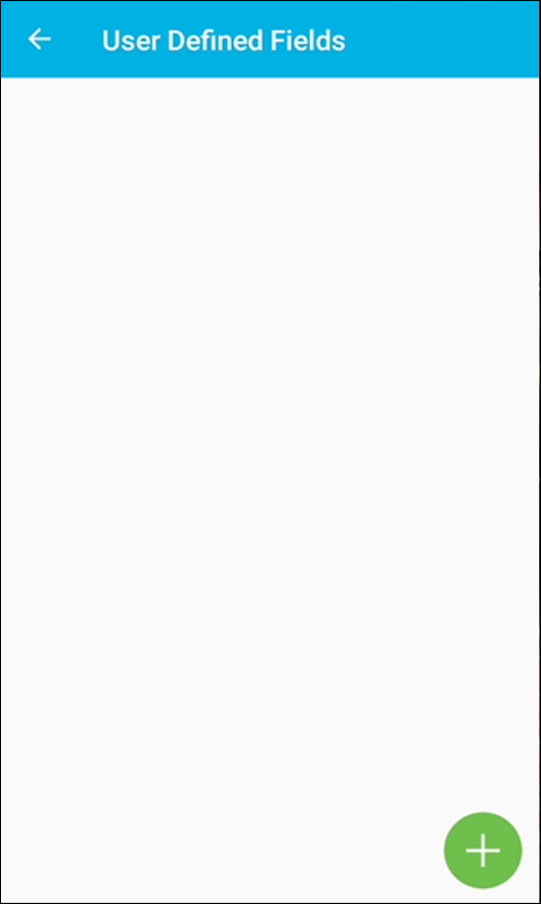
- Tap the Add icon to add a user defined field.
- The User Defined Fields form is placed in Add mode.
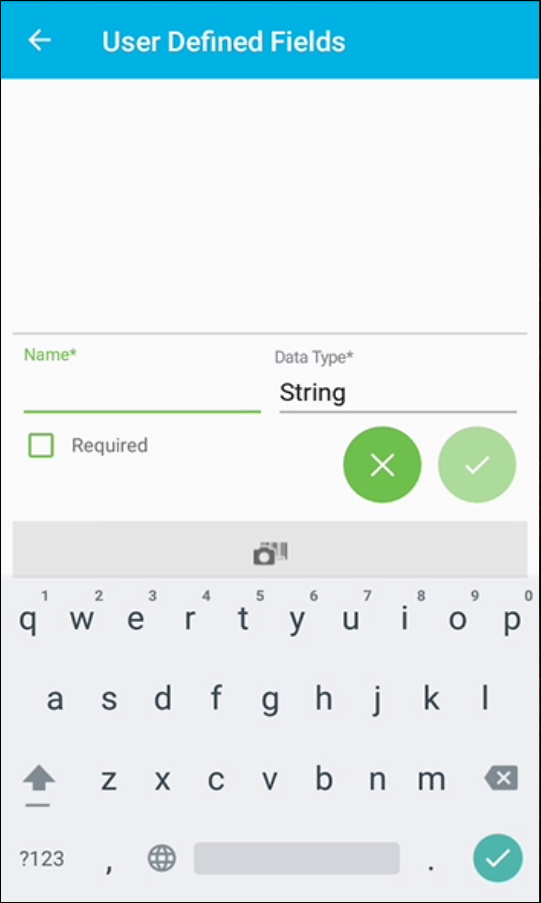
- Name: enter the user defined field name.
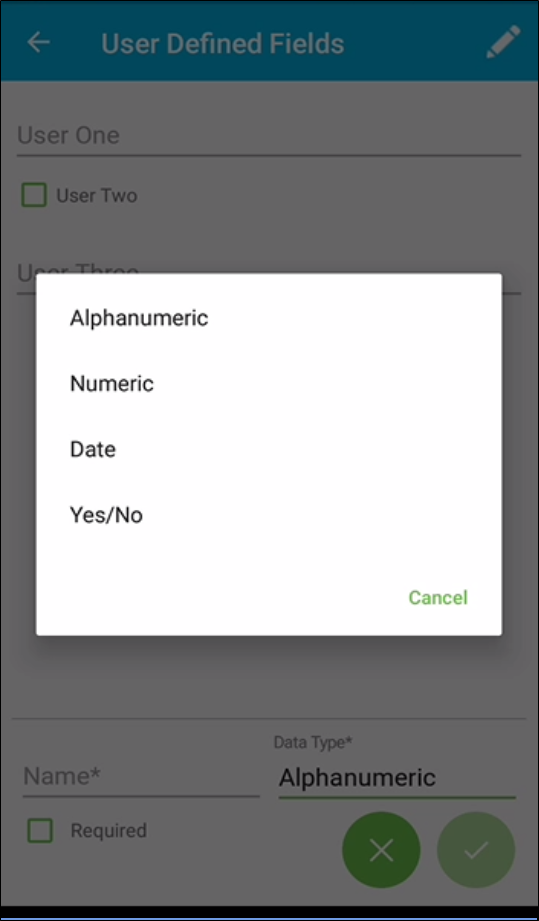
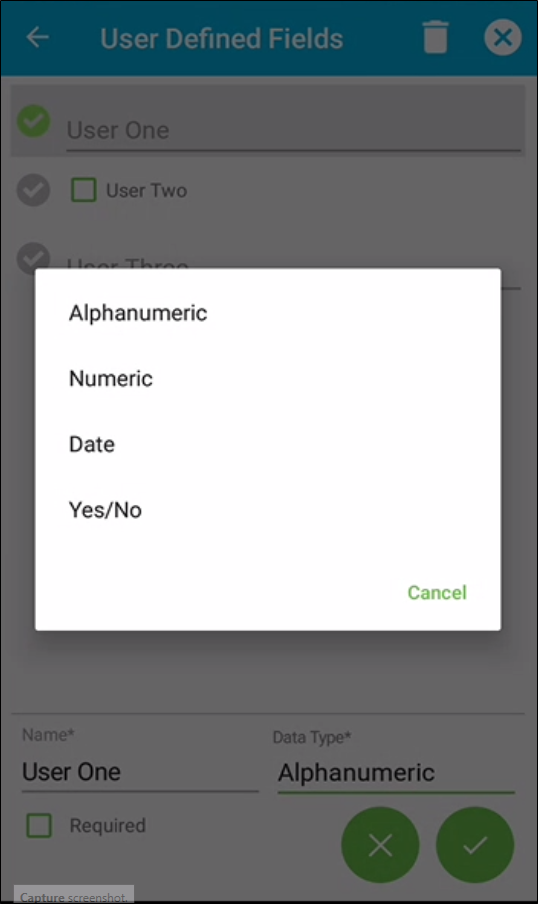
- Data Type: click in the field to view the data type options for this field and select the data type for this field.
- Alphanumeric: field accepts letters, numbers, and character. Select this data type if this field will include information that uses letters and numbers, such as names, titles, addresses, order numbers, etc.
- Date: field accepts a date. Select this data type if this field will include a date only.
- Numeric: field accepts numbers and decimals. Select this data type if this field will include numerals only, such as for currency, percentage, count, etc.
- Yes/No: inserts a checkbox field; user may mark the checkbox if true. Select this data type if the value is true or false.

- Required: to make this field required for receiving a package, mark this checkbox. (When a user defined field is required, the user must enter a value in this field in order to save the package.)
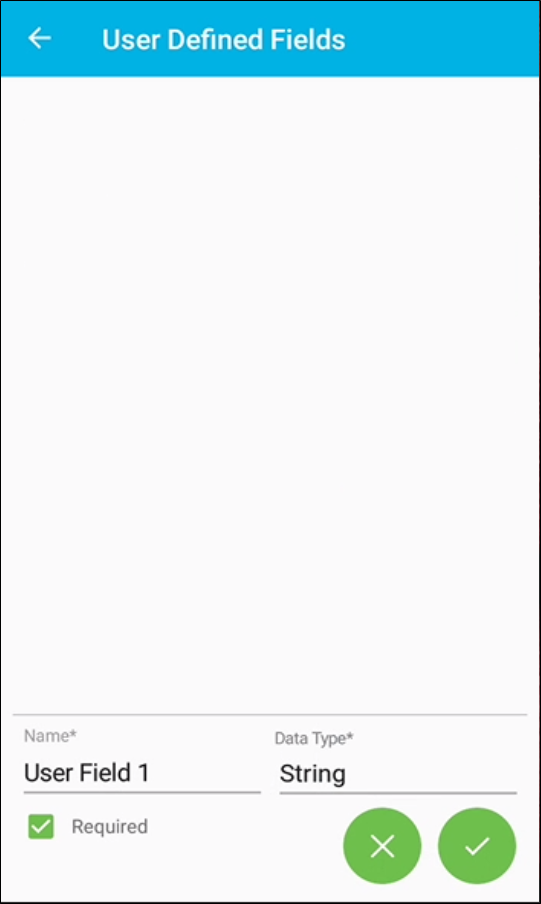
- Save button: tap the Save button to save the user defined field.
- Repeat steps 1-9, until you are finished adding the user defined field.
- When you submit the package for receipt, the user defined field or fields are added to the system.
Editing a User Defined Field
A user defined field may be edited.
- Name: The name of the user defined field may be edited.
- Data Type: The data type of the user defined field may be edited if the field does not contain any values.
- Required Status: The required status of the user defined field may be edited if the field does not contain any values.
Deleting a User Defined Field
The user defined field may be deleted if it does not contain any values.
How to Edit a User Defined Field
- To edit a user defined field, select the field to place it in Edit mode.

- Name field: tap in the field to place it in Edit mode; edit the name.

- Data Type field: tap in the field to display the Data Type options; edit the data type. (NOTE: The data type can only be edited if the field does not have any values.)
- Save button: tap the Save button to save the changes.
- When you submit the package for receipt, the user defined field change will be saved to the system.
How to Delete a User Defined Field
- Select the field.
- Click the Trash Can icon along the top of the form.

- When you submit the package for receipt, the user defined field will be removed from the system.